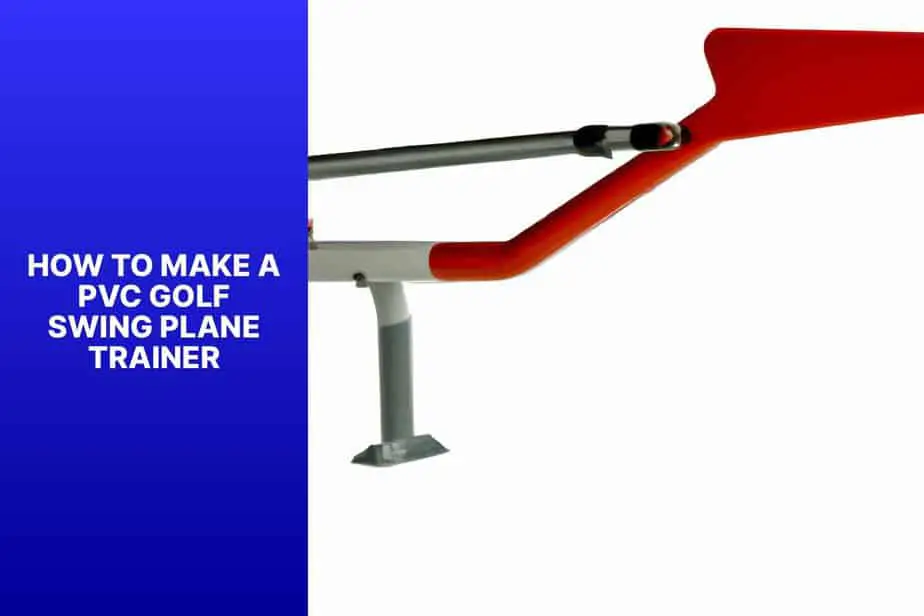
The PVC golf swing plane trainer is great for golfers who want to step up their swing game. It’s made from affordable materials and helps you practice with accuracy. You can benefit from this training aid to improve your performance on the golf course.
It provides instant feedback on your swing plane. It’s made of a PVC pipe connected to two smaller pipes, creating a triangle shape. Attaching it to your club allows you to see whether you’re following the right path. You can then make adjustments to ensure you hit the ball evenly.
It also helps you maintain posture when you address the ball and swing. You can get used to good habits early on which will result in a stronger, more reliable swing.
To get the most out of the PVC golf swing plane trainer, do the following:
- Start with slow swings to focus on form and technique rather than power. This will help you remember what to do and result in smoother swings.
- Analyze your swings with video. Record yourself from different angles to spot any errors or areas for improvement.
- Do drills specifically made for the PVC golf swing plane trainer. Try different exercises that target specific aspects of your swing, like tempo or weight shift. This will help you ingrain muscle memory and give you better results on the course.
Benefits of using a PVC golf swing plane trainer
Golfers of all skill levels can experience numerous benefits from using a PVC golf swing plane trainer. These include: improved mechanics, increased power and accuracy, enhanced muscle memory, better clubhead control, and greater consistency.
Plus, you can use the trainer indoors or at home when you don’t have time to hit balls at the driving range or play on a course. To get the most out of it:
- Set specific goals for each session.
- Practice regularly and consistently.
- Seek feedback from an instructor or use video analysis.
- Incorporate additional training aids or props.
Do this and you may just unlock your full potential on the course!
Materials needed to make a PVC golf swing plane trainer
To create a PVC golf swing plane trainer, the following materials are required:
- PVC pipes
- PVC connectors
- PVC caps
- Zip ties or adhesive
One can use these materials to construct a PVC golf swing plane trainer. It is important to note that additional details or variations in the instructions have not been covered yet. A pro tip for this project would be to ensure the stability of the PVC structure by reinforcing it with zip ties or adhesive.
If you think PVC pipes are only for plumbing, wait till you see how we turn them into a golf swing trainer—fore!
List of required PVC pipes and fittings
PVC pipes and fittings are a must when it comes to making a golf swing plane trainer. They provide the structure and stability needed for success. Here is a list of what you need:
- 1-inch diameter PVC pipe (8 feet long)
- 1¼-inch diameter PVC pipe (4 feet long)
- ¾-inch diameter PVC pipe (2 feet long)
- Four 1-inch PVC tees
- Two 1¼-inch PVC elbows
- One 1-inch PVC elbow
- Six 1-inch PVC caps
These sizes and shapes make sure that the trainer is strong enough for repeated use. The different parts give flexibility to fit different needs.
You can find these materials at hardware stores or online. They are very affordable, making this DIY project cost-effective.
The story behind this creation is interesting. A golfer wanted to make their own trainer after seeing a fellow golfer improve with a similar device. They wanted to elevate their game, so they started their own journey.
Time to get to work and craft your swing plane trainer with these tools!
Tools required for assembly
The right tools are vital when you’re constructing a PVC golf swing plane trainer. Here’s a list of what you need:
- Measuring Tape: You must measure correctly to be sure your trainer is built properly. A tape measure is necessary.
- Hacksaw: To cut the PVC to the right length, a hacksaw will be your best friend. It gives clean cuts and lets you put it together precisely.
- PVC Cement: This sticky stuff is essential for joining the PVC parts firmly. It makes a strong connection, so your trainer stays sturdy.
You might need a few extra tools based on the design of your trainer. Make sure you have a well-lit workspace with fresh air for comfort.
This project can help you become a better golfer. Don’t miss the chance to make your own PVC golf swing plane trainer and get better at golf!
Step-by-step instructions on assembling the PVC golf swing plane trainer
In the article titled ‘How to make a PVC golf swing plane trainer’, we will provide a professional and informative guide on assembling the PVC golf swing plane trainer. Follow these steps to create your own trainer:
- Gathering the materials:
- PVC pipes (lengths will vary depending on your desired dimensions)
- PVC connectors (elbows, tees, and couplings)
- PVC primer and cement
- Measuring tape
- Saw
- Planning the dimensions:
- Determine the desired height and width of your trainer.
- Measure and mark the PVC pipes accordingly.
- Use a saw to cut the PVC pipes to the specified lengths.
- Assembling the base:
- Connect the PVC pipes to create the base of the trainer.
- Use elbows and tees to create a stable structure.
- Ensure all connections are tightly secured with PVC primer and cement.
- Creating the swing plane guide:
- Attach additional PVC pipes vertically to the base to represent the swing plane guide.
- Adjust the height and angle of these pipes to match your desired swing plane.
- Secure these pipes with couplings and cement.
- Adding stability and adjustability:
- Include additional support pipes or braces where necessary to enhance stability.
- Consider adding adjustable elements, such as removable sections, to modify the trainer as needed.
This step-by-step guide provides all the necessary instructions for assembling your PVC golf swing plane trainer. Follow each step carefully to ensure proper construction and functionality.
Lastly, don’t miss out on the opportunity to improve your golf swing with this DIY trainer. Start creating your PVC golf swing plane trainer today and take your golf game to the next level!
Get your hacksaw ready, because we’re about to turn those innocent PVC pipes into a swing plane trainer that’ll have your buddies begging for lessons.
Cutting and measuring the PVC pipes
Need to cut and measure PVC pipes for your golf swing plane trainer? Here’s what you need to do:
- Determine the desired length.
- Mark the measurements accurately.
- Secure the pipe in a vise.
- Cut with a hacksaw, taking your time.
- Smooth out rough edges with sandpaper.
- Remember to wear protective gear like gloves and goggles while cutting.
Now you’re ready to put it together and beat your opponent’s scorecard!
Fitting the PVC pipes and joints together
- Attach an elbow joint to one end of a two-foot PVC pipe section.
- Connect a three-foot PVC pipe to the other side of the elbow joint.
- Slide a T-joint into the open end of the three-foot section.
- Lastly, attach another two-foot PVC pipe to the end of the T-joint.
Make sure all the connections are tight and secure to provide stability while using it. Golf Digest states that practising with a swing plane trainer can help perfect your swing, accuracy and consistency! So tighten those joints until they’re as tight as your grip on a hole-in-one opportunity, because this PVC golf swing plane trainer is here to stay!
Securing the joints and making adjustments
Steps:
- Gather all the PVC pipes and connectors from the list of materials. Ensure you have everything before starting.
- Insert the right fittings into each end of the tubes, as per the design instructions. Twist to secure them in place.
- Check for any loose parts or wobbling. If needed, reinforce weak points with extra connectors or adhesive.
- Adjust the height and angle of the trainer according to your height and preferred swing.
- Test stability by swinging a club through it – adjust if necessary to get a smooth, fluid swing, with no obstructions or instabilities.
- Pay attention to details when connecting and adjusting – they make a difference.
- Maximize benefits of this DIY trainer and perfect your golf swing!
- Just don’t force the trainer with an angry swing unless you have great insurance!
Tips for using the PVC golf swing plane trainer effectively
Using the PVC golf swing plane trainer effectively can greatly improve your golf swing. Here are six tips to help you get the most out of your training sessions:
- Align the trainer correctly: Position the PVC golf swing plane trainer parallel to your target line, ensuring that it matches the angle of your desired swing plane.
- Maintain proper grip and stance: Before swinging, ensure that your grip and stance are aligned with your target line. This will promote consistent swing mechanics and help you maintain control throughout your swing.
- Focus on tempo and timing: Use the PVC trainer to practice a smooth and controlled swing tempo. Pay attention to the timing of your backswing and downswing, and strive for a fluid motion that generates power and accuracy.
- Monitor your body positions: Pay close attention to your body positions throughout the swing. The PVC trainer can help you develop a more connected swing by keeping your arms and body in sync.
- Practice swing path and rotation: Utilize the trainer to work on your swing path and rotational movements. By repeatedly swinging with the PVC trainer, you can train your muscles to execute the correct motions and develop muscle memory.
- Analyze your swing with video feedback: Record your swings while using the PVC trainer and review the footage to identify areas for improvement. This visual feedback can help you spot any flaws in your technique and make necessary adjustments.
Additionally, it’s crucial to remember that consistency and dedication are key to effectively using the PVC golf swing plane trainer.
Practice regularly and implement the techniques learned to see significant improvements in your golf swing.
Don’t miss out on the opportunity to enhance your golf skills with the PVC golf swing plane trainer. Start incorporating it into your training routine today and experience the benefits firsthand. Improve your swing mechanics, gain more control, and ultimately enhance your overall performance on the golf course.
Mastering the proper positioning and grip techniques will make you feel like you’re swinging a golf club, not flailing a PVC pipe at your neighbor’s garden gnome.
Proper positioning and grip techniques
Positioning and grip are key to mastering the PVC golf swing plane trainer. Follow these 6 steps:
- Align your body to target. Feet shoulder-width apart and parallel. Hips and shoulders square.
- Left hand on club grip. Position more towards fingertips than palm. Thumb pointing down.
- Right hand grip: Interlock pinky with left index finger or overlap slightly. Right lifeline resting on left thumb.
- Check clubface position. Align it parallel to an imaginary line between feet.
- Equal pressure with both hands. Firm but relaxed grip.
- Spine straight. Tilt from hips. Slight knee flex.
Persistence is key. Also, adjust gripping pressure & experiment with finger placement for comfort and flexibility.
Golf Digest recommends using aids like the PVC swing plane trainer. Get ready to master it with drills!
Choosing the right drills and exercises
- Start with basic drills to build a solid swing foundation – grip, stance, and alignment.
- Once you have the basics down, progress to complex drills. Focus on weight transfer, rotation, and timing.
- Identify areas that need improvement and target these with specific drills. If your backswing needs work, find exercises to make it smooth and consistent.
- Mix up your practice with full swings, pitch shots, and putting.
- If unsure, get advice from a golf instructor or coach.
- Consistency is key – keep up with drills and exercises to see progress.
- Everyone’s golf swing is unique – experiment to find what works best.
- And don’t shy away from challenging yourself with new drills and techniques. Keep an eye on your swing plane, or you may be sending balls into neighboring yards!
Monitoring and adjusting swing plane alignment
-
Set up the PVC golf swing plane trainer. This will help you practice staying on the right track.
-
Stand parallel to the alignment stick or PVC pipe, so it’s pointing at your target.
-
Address the ball with your feet shoulder-width apart and knees slightly flexed. Grip the club relaxed and arms extended.
-
Focus on the clubhead during the backswing. Keep it on the same plane as the alignment stick or PVC pipe.
-
Stay connected to your body and rotate through impact during the downswing. Visualize the clubhead sliding down the PVC pipe.
-
After each shot, evaluate and adjust if necessary.
Every golfer’s journey is unique. Flexibility, strength, and body mechanics can influence how well you maintain proper alignment.
Jack Nicklaus faced a challenge with his swing plane alignment in 1987. He began monitoring and adjusting it, and with some help, improved accuracy and control. This shows the importance of fine-tuning swing plane alignment for even the most experienced golfers.
Remember to monitor and adjust your swing plane alignment. With dedication and practice, you’ll see big improvements in your golf game. Enjoy your swings!
Maintenance and care for the PVC golf swing plane trainer
Maintenance and care for the PVC golf swing plane trainer is essential for its longevity and optimal performance. To ensure the durability and functionality of the trainer, follow these guidelines:
- Inspect regularly: Periodically check the PVC golf swing plane trainer for any signs of wear, such as cracks or loose fittings. Address these issues promptly to prevent further damage.
- Clean after each use: After each training session, clean the trainer using a mild soap and water solution. This will remove any dirt or debris and maintain its appearance.
- Store properly: When not in use, store the PVC golf swing plane trainer in a dry and secure location. Avoid exposing it to extreme temperatures or direct sunlight, as these can degrade the material over time.
- Avoid excessive force: While the trainer is designed to withstand the forces generated during a golf swing, it is important to avoid excessive force or misuse. Follow the recommended instructions and usage guidelines to prevent damage to the trainer.
- Lubricate moving parts: If the PVC golf swing plane trainer has any moving parts, such as hinges or joints, apply a silicone-based lubricant to ensure smooth operation. This will also help prevent rust and corrosion.
- Check stability: Regularly check the stability of the trainer, ensuring that it remains securely in place during use. Tighten any loose fittings or screws to maintain stability and prevent accidents.
These maintenance practices will help prolong the lifespan of the PVC golf swing plane trainer and ensure its continued effectiveness in improving your golf swing.
Pro Tip: If you notice any significant damage or wear on the trainer, consider consulting a professional or contacting the manufacturer for repairs or replacements.
Cleaning and storing the trainer properly: Because unlike your golf swing, leaving this PVC contraption lying around won’t improve with practice.
Cleaning and storing the trainer properly
To keep your PVC golf swing plane trainer in top condition, it’s essential to clean and store it properly. Here’s what to do:
- Wipe it down with a damp cloth after each use.
- Remove stubborn stains with mild soap and water. Avoid harsh chemicals.
- Let it dry completely before storing. This stops mold or mildew.
- Find a cool, dry place away from sunlight. Avoid extreme temperatures too.
Pro Tip: Cover the trainer with a protective cover or bag when not in use.
Check for damage regularly – it’s bound to happen eventually!
Inspecting for any damage or wear
Start by taking a close look at the entire training device. Scan for cracks, dents, or breaks in the PVC material. Check the joints and connections between the pipes. Look out for loose or weakened fittings and examine any additional attachments – such as straps or handles – to make sure they’re securely fastened.
Test the stability of the trainer by pushing it gently in different directions. A sturdy trainer should not wobble. Assess the grip area, where you hold onto the trainer during use, for any fraying or deterioration that may affect your grip.
Unique factors to consider when inspecting a PVC golf swing plane trainer:
- The extreme weather can make the trainer wear out quicker. Check it more often if it’s exposed to sun or moisture.
- The frequency and intensity of usage can also have an effect. If you practice with high swings or powerful strokes, inspect the trainer more often.
To maintain the trainer:
- Store it in a safe place when it’s not in use.
- Wipe away dirt and debris after each session using a damp cloth.
- Lubricate moving parts like joints and fittings to prevent friction-related damage.
Inspect your PVC golf swing plane trainer and follow the tips above to keep it in great condition. Prevention is key!
Conclusion and final thoughts on the PVC golf swing plane trainer
The PVC golf swing plane trainer is amazing! It helps you learn how to swing and build muscle memory. It’s easy enough for beginners, yet helpful for experienced players.
What makes it special? It shows you proper body positioning and the right path to take. That’s more than one benefit in a single tool.
To get better faster:
- Film your swing for an extra eye.
- Do drills to target weak areas.
- Practice and build speed.
The PVC golf swing plane trainer is super useful. Devote time to it and you’ll get better. Professional or beginner, this tool can take your game to the next level.
Frequently Asked Questions
FAQs about How to Make a PVC Golf Swing Plane Trainer
1. What materials do I need to make a PVC golf swing plane trainer?
To make a PVC golf swing plane trainer, you will need the following materials:
- PVC pipes
- PVC connectors and elbows
- PVC glue
- A PVC cutter or saw
- Measuring tape
- Sandpaper
2. How do I assemble the PVC golf swing plane trainer?
Follow these steps to assemble the PVC golf swing plane trainer:
- Measure and cut the PVC pipes to the desired lengths. You will need two long pipes for the sides and shorter pipes for the crossbars.
- Use the PVC glue to attach the connectors and elbows to create the desired shape. Make sure everything is securely attached.
- Sand down any rough edges with sandpaper to ensure a smooth finish.
3. Can I customize the size and shape of the PVC golf swing plane trainer?
Absolutely! The beauty of using PVC pipes is that you can easily customize the size and shape of the golf swing plane trainer to fit your needs. Just make sure to adjust the measurements and cut the pipes accordingly.
4. How do I use the PVC golf swing plane trainer?
To use the PVC golf swing plane trainer, position it on the ground or on a practice mat. Stand in the middle of the structure, aligning your feet with the crossbars. Take your golf club and practice swinging back and forth, following the path of the PVC pipes. This will help you develop a proper swing plane.
5. Can I disassemble the PVC golf swing plane trainer for easy storage?
Yes, you can disassemble the PVC golf swing plane trainer by simply removing the connectors and elbows. Store the disassembled parts in a safe place until the next practice session. It’s a convenient feature for those with limited storage space.
6. Are there any safety precautions to keep in mind when using the PVC golf swing plane trainer?
While using the PVC golf swing plane trainer, be cautious of your surroundings and ensure there is enough space around you to swing the club freely. Also, periodically inspect the PVC pipes and connectors for any signs of wear or damage. Replace any damaged parts to maintain safety during your practice sessions.

Liam Drake, an avid golfer and seasoned outdoor enthusiast, brings his passion for the greens to his golfing blog. With years of experience swinging clubs and exploring courses around the world, Liam shares his insights, tips, and personal stories to inspire and guide fellow golf lovers. Whether it's breaking down the latest gear, navigating challenging courses, or just sharing a memorable round, Liam's blog is a treasure trove for anyone who shares his love for the game.
Address: 1 S Grove St, 43081, OH, USA
