To improve your golf swing, master a proper wrist bow with this introduction. Understand the significance of a correct wrist bow in your golf swing, as we delve into its explanations and importance.
Explanation of the importance of a proper wrist bow in the golf swing
A proper wrist bow is key to a successful golf swing. It can help create power and accuracy, giving you better control over the ball’s trajectory. Keeping the right wrist position throughout the swing also ensures proper clubface alignment at impact, improving distance and precision.
Consistency is another benefit of a proper wrist bow. It keeps the clubface angle consistent throughout the swing, reducing the chances of wayward shots. This results in a repeatable motion, making it easier to hit your desired shots.
Weight transfer is also possible thanks to a proper wrist bow. When bowing during the backswing, it loads weight onto the trail side (right for right-handed), forming a strong base for an explosive downswing. This boosts power and increases distance.
It’s important to practice and be attentive when working on your wrist bow. Keep your lead arm straight while hinging your wrists during the backswing. Also, avoid over-bowing or cupping excessively, as this can affect ball striking.
Golf Digest states that an improper wrist bow can result in various swing flaws, such as slicing or hooking the ball. So, mastering this fundamental golf swing aspect is essential for players aiming to up their game.
Basic concepts of wrist bowing in golf
To achieve a proper wrist bow in your golf swing, familiarize yourself with the basic concepts. Understanding the definition of wrist bowing and its role in the swing is key. Additionally, recognizing the benefits that come with executing the correct wrist bowing technique will enhance your overall performance on the golf course.
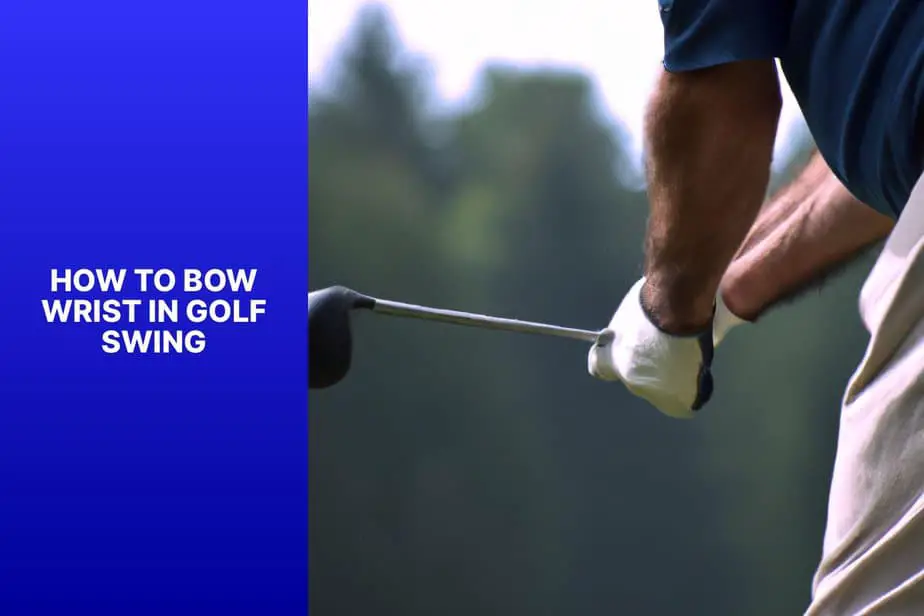
Definition of wrist bowing and its role in the golf swing
Wrist bowing is key in the golf swing. It requires a flexed wrist during the backswing and a slight extension during impact. This helps generate power and accuracy by controlling the clubface and sequencing body movement.
Imagine a tennis player preparing for a powerful serve. They bring their racquet back, with their wrist bowed to generate force. In golf it’s the same: the bowed wrist allows for maximum clubhead speed by creating tension and storing energy.
To get it right you need good grip pressure and forearm rotation. Bowing the lead wrist during the takeaway and transition phases stops slices or hooks. As the wrists hinge downwards at impact, contact with the ball’s sweet spot means greater distance and accuracy.
To master wrist bowing you should:
- Practice grip stability.
- Develop forearm strength, with resistance bands or weights.
- Use training aids, like alignment sticks.
- Seek professional guidance.
These tips will help you get the wrist bowing right. Mastering this will unlock loads of potential for more power and precision on the course.
Benefits of proper wrist bowing
Bowing your wrists in golf brings lots of benefits that help you to have a successful swing. Firstly, it helps you hit the ball accurately and consistently. Secondly, it gives you more power and distance because of the lever effect it creates during the downswing. Plus, it makes sure the clubface is aligned and reduces your chances of slicing or hooking the ball. By mastering this technique, you can keep a steady rhythm and timing during your swing. So, practice the wrist bowing technique and take your golf game to the next level!
Here’s a step-by-step guide to help you master the art of wrist bowing in your golf swing:
Step-by-step guide to achieve a proper wrist bow in the golf swing
To achieve a proper wrist bow in your golf swing, follow this step-by-step guide. Start with the grip and hand position, then address the ball with a neutral wrist. Next, focus on the proper wrist hinge during the backswing, maintaining wrist bowing through the downswing, and finally, the follow-through and release with the maintained wrist bow.
Step 1: Grip and hand position
Grip and hand position are important for a successful wrist bow in golf. Let’s delve into the specifics:
- Securely grip the club with your left hand at the top, with the pad of your thumb resting on the grip. Wrap your fingers around the club.
- Place your right hand below your left, with your right thumb slightly to the left of center.
- Maintain a neutral position with both hands. Avoid cupping or bending wrists, as this can lead to bad shots and injury.
- Make sure your hands work together as a unit throughout the swing. Synchronize them for maximum power and accuracy.
It’s worth noting that these steps are just guidelines. Variations may exist based on factors such as player preference and physical characteristics.
Grip pressure is key for control over the club during the swing. Grip firmly but not too tightly, as this restricts movement.
Find the balance between stability and flexibility when finding a hand position. Experiment until you find one that allows for controlled movement.
An example: A golfer had difficulty with his grip and hand position. He lacked power and accuracy, so he sought professional help. With practice, he gained a better hold on the club, and his shots became consistent. He also gained distance and control – proof of the power of proper grip and hand position!
Step 2: Addressing the ball with a neutral wrist position
Time to get a-swingin’! To address the ball with a neutral wrist position, follow these 6 steps:
- Stand behind the ball, aligned with the target.
- Feet shoulder-width apart and parallel to the target line.
- Flex knees and tilt forward from the hips, keeping a straight back.
- Hold the club in front of you with both hands, making sure your wrists are relaxed.
- Slight bend in elbows, close to the body.
- Position the clubhead directly behind the ball, aligning with the target.
Remember to avoid any tightness or tension in the wrists when addressing the ball. This can restrict movement and prevent successful wrist bow in the swing. Keep ’em relaxed for greater flexibility and fluidity!
Pro Tip: Consistent grip pressure is essential. Not too tight, not too loose – just right for optimal control and power transfer during impact.
Step 3: Proper wrist hinge during the backswing
Golfers have known for centuries that a proper wrist hinge during the backswing is vital. It helps with power and accuracy. Learn from history and use drills to get it right!
Steps to Remember:
- Grip the club with your lead hand, diagonally across your fingers.
- Start the backswing, firm but relaxed grip.
- Rotate your shoulders and hips, then hinge your wrist backward.
- Keep the angle between the shaft and forearm to 90°.
- Let the hinge happen naturally from body rotation.
- Practice slowly and build muscle memory.
Every golfer’s swing is different, so you may have to experiment to find what works best for you. Plus, a proper wrist hinge looks great and shows skill!
Step 4: Maintaining wrist bowing through the downswing
For wrist bowing in the downswing, follow these three steps:
- Keep wrists bowed during the backswing. This helps power and control.
- When transitioning to the downswing, maintain the bow in your wrists. Don’t collapse or release too early.
- Focus on keeping wrists stable and connected to the club when hitting the ball. This helps power transfer.
Plus, timing and coordination with body movements are important for wrist bowing. It takes practice to make a smooth, fluid swing.
Pro Tip: Drills that focus on wrist stability and control can help with wrist bowing. Hit balls while keeping wrists bowed in the swing motion. This practice will help make it easier to keep wrist bowing consistent.
Step 5: Follow-through and release with a maintained wrist bow
Master your wrist bow with this three-step guide:
- Position your body: Keep your weight evenly distributed and your head still and centered. This will ensure a powerful, controlled swing.
- Maintain the wrist bow: Hinge your wrists slightly towards the target line and keep your grip light for natural hand and wrist movement.
- Extend your arms: Fully extend your arms to the target after contact with the ball for extra power and accuracy. Keep a firm but relaxed grip throughout.
For better follow-through and release, try:
- Practicing tempo and rhythm: Synchronize your body and arm movements for a smooth flow.
- Focusing on alignment: Make sure the clubface is square and aligned with your target line.
- Visualizing success: Before each swing, visualize yourself performing perfectly.
By following these steps, you can master the follow-through and release with a maintained wrist bow for better ball control, accuracy, and improved performance on the golf course!
Common mistakes to avoid when bowing the wrist in the golf swing
To avoid common mistakes when bowing the wrist in the golf swing, follow these guidelines. Overbowing the wrist, premature unhinging of the wrist, and lack of wrist bowing during the swing are the sub-sections that will provide solutions to ensure proper wrist alignment and enhance your golf performance.
Mistake 1: Overbowing the wrist
Overbowing the wrist in the golf swing is a major no-no. It leads to an imbalance and loss of power. To avoid this mistake, here are four steps:
- Maintain a neutral wrist position all through the swing. No excessive bowing or cupping!
- Build strength and flexibility in your forearm and wrist. This gives better control and stability.
- Pay attention to your body alignment and posture. A balanced stance will help.
- Ask a professional instructor or coach for help. They can give exercises and drills to correct the wrist.
For added improvement, focus on a smooth tempo during the swing, with natural extension and release at impact.
Pro Tip: Watch yourself swing in a mirror or record yourself. Visual feedback is useful for preventing overbowing.
Mistake 2: Premature unhinging of the wrist
Don’t commit the mistake of premature unhinging of your wrist in your golf swing! This happens when you release your wrists too soon, leading to loss of control and power. Follow these five steps to prevent this error:
- Keep your wrist hinged: During the backswing, stay firm and have a slight hinge. This gives you power and control.
- Control the downswing: When you transition, maintain the angle in your wrists. Avoid any early release of your wrists.
- Feel the lag: Create tension and power by keeping a sensation of lag between your hands and the clubhead during the downswing.
- Late release: Aim for a late release of your wrists at impact. This timing will make your clubhead faster, and your ball will compress more, resulting in greater distance and accuracy.
- Follow through with control: After impact, keep your wrists hinged as you follow through. This will enhance balance and keep your clubface from unwanted manipulation.
Practice is essential in getting the right wrist position. Repetition builds muscle memory so you can conquer this common mistake.
Pro Tip: To improve wrist control, practice swinging with a towel tucked under each arm. This drill promotes better body rotation and keeps the wrists from excessive movement, resulting in reliable swings.
Bad idea to think having a flat wrist in golf is stylish. It’s like wearing Crocs to a black tie event – just not the right look.
Mistake 3: Lack of wrist bowing during the swing
Golfers must avoid the mistake of not bowing their wrists during the swing. This means not angling or flexing them properly. Not bowing limits power and control. It also increases the risk of slicing or hooking the ball. Poor wrist position causes thin shots with reduced distance and accuracy.
Be sure to maintain a slight bend in the lead wrist (left for right-handed players) throughout the swing. This will generate power and maintain control. Practice drills focusing on proper wrist bowing. Rehearse slow-motion swings, paying attention to the lead wrist being firm and bowed.
By doing this, golfers can enhance their performance and improve their game. So, get those wrists ready to flex!
Drills and exercises to improve wrist bowing in the golf swing
To improve wrist bowing in your golf swing, explore these drills and exercises. Quickly, let’s go through them. First, try the wrist bowing drill with a training aid. Then, consider mirror work to monitor your wrist bowing. Lastly, practice swings while focusing on maintaining the wrist bowing.
Drill 1: Wrist bowing with a training aid
Wrist bowing is essential for a powerful and precise golf swing. Drill 1 helps golfers perfect their posture by using a training aid. Here are the steps:
- Attach the training aid designed for wrist bowing.
- Grip the club like normal.
- Place the training aid against the back of your lead hand.
- Focus on keeping it against your hand during your swing.
- Repeat multiple times to make muscle memory.
This drill provides quick feedback and encourages correct positioning. It helps with control and accuracy in shots.
To get the most out of it, start slow and speed up gradually. This will help maintain form and stop tension in your wrists. Consistency is key for mastering wrist bowing.
With regular practice of Drill 1, you can improve wrist bowing and up your golf game! So grab your training aid and start the drill!
Drill 2: Mirror work for monitoring wrist bowing
Mirror work is a great way to check and fix wrist bowing in your golf swing. What you do is take a look at yourself in the mirror while you swing. Here’s what you need to do:
- Put a full-length mirror in a spot where you have room to swing.
- Stand in front of the mirror, feet shoulder-width apart, slightly bent knees.
- Grip a club with both hands in your normal grip position.
- Take your golf stance like you would on the course.
- Make slow practice swings, keeping your eyes on the mirror.
- Check your wrists – has it bowed or broken at impact?
Remember to keep proper posture and swing tempo during this drill. With regular practice, you can identify and adjust wrist bowing.
Let me tell you about Alex. He had an issue with his backswing, causing wrist bowing. He read about mirror work, so he tried it out. After a few weeks, he saw lots of improvement. By looking at himself in the mirror, he was able to observe and fix his wrist. His shots became more accurate and he was confident in his wrist control. Mirror work was now a key tool for him.
Drill 3: Practice swings focusing on maintaining wrist bowing
In golf, wrist bowing is key for accuracy and power. To improve, do Drill 3: practice swings focused on wrist bowing. Here’s a 4-step guide:
- Take stance and grip club properly.
- On backswing, keep leading wrist bowed or cupped.
- Keep same wrist position during downswing and impact, avoiding any collapsing or hinging.
- Hold position through follow-through and finish of swing.
By practicing regularly, you can develop muscle memory and train wrists to maintain bowing. This allows for greater control of clubface angle at impact, leading to better shots and distance control.
To illustrate, I once played with a friend who had inconsistency in shots. After observing his swing, I noticed he was losing alignment due to improper wrist positioning. I introduced him to Drill 3 and with practice, his shots became much more consistent.
Honing your skills in wrist bowing takes time and effort. Incorporate Drill 3 into your training routine to watch your golf swing improve! And wrap up to avoid ending up in physio – nothing says ‘I love golf’ like a wrist injury!
Conclusion
To conclude, master the art of the wrist bow in your golf swing with these essential tips. Recap the significance of proper wrist bowing, and discover final insights to enhance and implement this crucial technique effectively. Elevate your golf game by achieving optimal wrist bow in every swing.
Recap of the importance of a proper wrist bowing
Proper wrist bowing is essential for musicians to achieve perfection. It provides control and articulation, improving the sound of an instrument. Let’s look at six key points on its importance:
- Positioning: Keeping the wrist straight with the forearm allows energy to flow better from arm to bow, making sound stronger.
- Articulation and dynamics: Proper wrist bowing allows musicians to change pressure on strings, creating different articulations and dynamics, which adds depth and feeling.
- Smooth bow changes: Good wrist bowing lets musicians transition from one part of the bow easily, allowing for uninterrupted phrasing.
- Bow control: The wrist is important in controlling bowing like speed, pressure, and angle. Knowing proper wrist movement gives better control of sound.
- Tone production: How the wrist interacts with the bow affects tone quality. Correct wrist movements can create richer, more resonant sounds.
- Injury prevention: Practicing correct wrist bowing decreases strain on hand and forearm, reducing the risk of repetitive strain injury.
In addition, keeping a firm yet relaxed grip on the bow helps with effective bowing. This allows for smoother movements without tension or force, giving better performances.
To further improve your wrist bowing technique:
- Try different finger positions on the bow’s frog to find what works best for you.
- Include exercises in your practice that help strengthen wrists.
- Get advice from experienced teachers and musicians who can give you feedback and guidance on refining your technique.
By doing these things, you will be able to develop a precise and controlled wrist bowing technique, improving your musical performances. Remember, time and effort spent perfecting this fundamental aspect will pay off.
Final tips for implementing and improving wrist bowing in the golf swing
- Grip: Hold the club with your lead hand palm facing down, and your back hand to the target.
- Tension: Keep your wrists slightly tensed during the swing.
- Start small: Begin with small wrist bows then increase the motion.
- Timing: Time your wrist movement with the rest of the swing.
- Drills: Use drills, like hinging at impact or an alignment stick, to improve wrist bowing.
- Get help: Ask a golf instructor for personal advice to perfect your technique.
Plus, body rotation is essential. Rotate your body, keeping your lower body stable, for strong wrist movement.
Visualize the ideal wrist position for each swing stage. This will help create muscle memory and consistency.
By applying these tips to your golf swing, you can gain control and power. Consistency is key, so be patient and keep practicing.
Frequently Asked Questions
FAQs: How to Bow Wrist in Golf Swing
1. Why is it important to bow the wrist in a golf swing?
Bowing the wrist in a golf swing helps to generate more power and control by maintaining a strong and stable clubface through impact. It allows for better contact with the ball and helps to prevent slicing or hooking shots.
2. How do I bow my wrist in a golf swing?
To bow your wrist, start by addressing the ball with your club. As you begin your backswing, consciously hinge your wrist so that the knuckles of your lead hand face the sky. As you swing down, maintain this hinge and actively bow your lead wrist, creating an angle between your lead forearm and the back of your lead hand.
3. What are some common mistakes to avoid when bowing the wrist?
The most common mistake is overbowing the wrist, which can lead to inconsistent shots. It’s important to find a balance and avoid excessive wrist movement. Additionally, avoid cupping the wrist at impact, as this can result in weak shots.
4. Can bowing the wrist help with accuracy?
Yes, bowing the wrist can significantly improve accuracy in a golf swing. By maintaining a strong and stable clubface through impact, you can better control the direction of your shots. It helps to square the clubface at impact, reducing the likelihood of slices or hooks.
5. Are there any specific drills or exercises to improve wrist bowing?
Yes, there are several drills and exercises that can help improve the bowing of the wrist in a golf swing. One popular drill is the “hinge and hold” drill, where you practice hinging your wrist on the backswing and maintaining that hinge through impact. Another exercise is using a training aid, such as a wrist hinge trainer, to develop a more consistent wrist hinge and bowing motion.
6. How long does it take to develop a proper wrist bow in a golf swing?
The time it takes to develop a proper wrist bow in a golf swing varies for each individual. It depends on factors such as your current skill level, flexibility, and practice frequency. With consistent practice and proper technique, most golfers can see improvements within a few weeks or months.

Liam Drake, an avid golfer and seasoned outdoor enthusiast, brings his passion for the greens to his golfing blog. With years of experience swinging clubs and exploring courses around the world, Liam shares his insights, tips, and personal stories to inspire and guide fellow golf lovers. Whether it's breaking down the latest gear, navigating challenging courses, or just sharing a memorable round, Liam's blog is a treasure trove for anyone who shares his love for the game.
Address: 1 S Grove St, 43081, OH, USA
