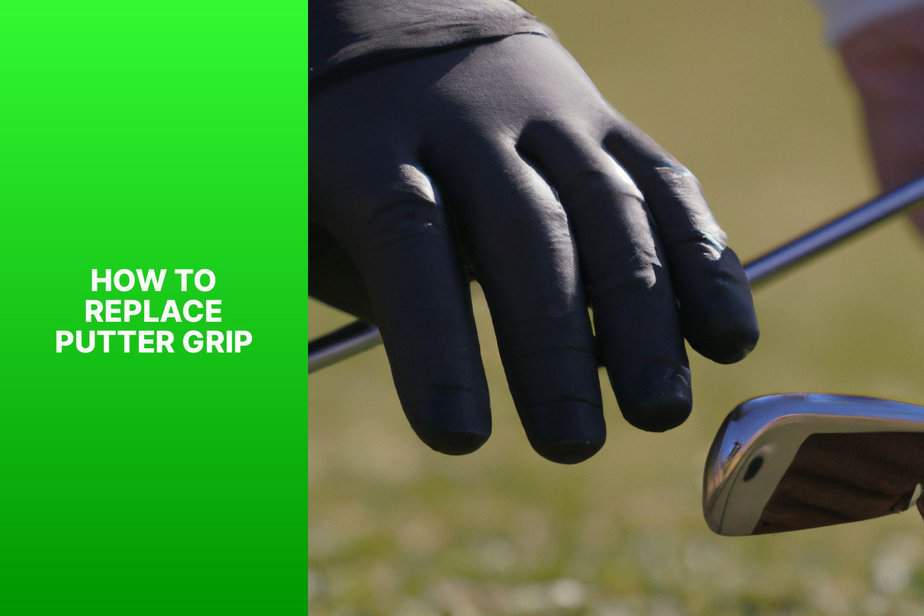
Putter grip replacement is key for golfers who want to up their game. A proper grip gives more control and stability, leading to better accuracy and consistency. Here, we show how to replace your grip easily.
Gather the tools you’ll need: a new putter grip, a utility knife/scissors, double-sided tape, grip solvent, and a vice/clamp.
- Cut open the old grip down its length with the knife or scissors.
- Peel it off with your hands or pliers.
- Clean any residue off.
- Apply double-sided tape along the shaft. Make sure it’s even and well stuck.
- Put grip solvent inside the new grip and slide it on.
- Align the grip correctly. Different grips have features or markings that need to be rightly placed for best performance. Consult the manufacturer’s instructions or get professional advice.
- Secure the putter in a vice/clamp. Let it sit undisturbed for at least 24 hours before use.
Replacing the grip can give you different textures and styles to suit your preferences. And it can make a major difference to your putting technique and overall game.
Golf Digest says: “A correctly sized putter grip helps square the face at impact and maintain consistent wrist action.” Don’t underestimate the importance of having the right grip – it can help you win on the green.
Importance of a Proper Putter Grip
Gripping a putter right can make or break a golfer’s game. It’s key to have the proper grip for improved accuracy and control. Without it, the golfer could struggle to keep their stroke consistent and find it hard to align the putter.
The significance of a proper grip can’t be overstated when it comes to putting. It gives stability, letting the golfer maintain control of the clubface while putting. This control is essential for accurate aim and distance control, since any change in grip pressure and hand placement can alter the putt’s outcome.
In addition, the right putter grip can prevent needless tension in the hands and arms. Tension can harm accuracy and feel of the putt, making it harder for golfers to make smooth strokes. By using a grip that promotes comfort and relaxation, golfers can improve their putting performance by reducing tension-related mistakes.
Different grips are available, such as traditional, reverse overlap, and crosshanded. Golfers should try out different styles to find one that suits their individual preferences and playing style. Trying out different options can help them find the grip that feels natural and lets them hit consistent shots on the greens.
Pro Tip: If you’re not sure how to select or replace your grip, get help from a professional club fitter or golf instructor who can give expert advice catered to your game.
Gathering the Necessary Tools and Materials
Gathering the essential tools and materials for replacing a putter grip requires careful consideration. Here is a concise and precise guide to help you gather what you need:
- Identify the tools: You will need a grip tape, a solvent or grip spray, a utility knife, and a clamp. These tools are essential in ensuring a successful grip replacement.
- Gather the materials: In addition to the tools mentioned above, you will also need a new putter grip. Choose a grip that suits your preferences in terms of size, material, and texture. It’s important to select a grip that provides the right amount of comfort and control.
- Prepare a clean work area: Before starting the grip replacement process, make sure you have a clean and organized workspace. This will prevent any unnecessary mishaps or distractions during the task.
It’s worth mentioning that proper gathering of tools and materials ensures a smooth and efficient grip replacement process. By having the necessary items ready, you can focus on the task at hand without any interruptions.
To make the grip replacement process even easier, consider the following suggestions:
- Label the tools: It’s a good idea to label the tools you will be using for grip replacement. This will help you stay organized and prevent confusion during the process. Additionally, keeping your tools labeled ensures that you won’t accidentally use them for other purposes, potentially damaging them.
- Use grip tape that matches your putter grip size: When selecting grip tape, make sure it matches the size of your new putter grip. Using the right size tape will ensure a snug fit and secure grip.
- Apply the solvent or grip spray evenly: When using the solvent or grip spray, make sure to apply it evenly to the grip tape. This will ensure proper adhesion and prevent any slippage or loosening of the grip over time.
Following these suggestions will contribute to a successful putter grip replacement. They will help streamline the process and ensure that you have all the necessary tools and materials.
Don’t worry, you won’t need a chainsaw or a jackhammer for this one – just a few simple tools to replace your putter grip.
List of Tools
Gathering the right tools and materials is essential for any project. So, let’s explore the list of tools you’ll need!
- A measuring tape, for precision when measuring distances and dimensions.
- Screwdrivers, of different types and sizes, to tighten or remove screws.
- A hammer, for driving nails, breaking objects, or using as a makeshift pry bar.
- A level, to make sure surfaces are straight and even.
- Pliers to grip, twist, and cut wires or hold fasteners.
- And a power drill, for quickly and efficiently drilling holes and driving screws.
Bear in mind that every project might require extra tools. Doing a bit of research beforehand is always a good idea. Quality matters too. High-end tools cost more, but they’re more durable and have ergonomic handles. Having all the necessary tools neatly organized in a toolbox will help you tackle any project with confidence. So, gather your tools wisely and get ready to start your project!
List of Materials
When it comes to crafting, preparation is key. Here’s a list of basics you’ll need:
- Measuring tape: Accuracy is essential.
- Screwdriver set: Various sizes are must-haves.
- Hammer: Hang pictures or furniture? You need one.
- Pliers: For gripping, bending, and cutting.
- Power drill: Drilling and driving tasks sorted.
- Safety gear: Goggles and gloves are non-negotiable.
Remember, this list isn’t comprehensive. Different projects require different items. For example, painting needs paintbrushes, rollers, trays, and drop cloths.
To guarantee success:
- Research the project in detail.
- Make a checklist.
- Buy quality tools and materials.
- Consider borrowing or renting.
- Store tools and materials properly.
- Always follow safety guidelines.
By following these steps, you’ll be ready to tackle your task. Now, let’s get crafting! And if you’re swapping out your golf putter grip, don’t forget: removing it is easier than getting that stain out of your shirt!
Removing the Old Putter Grip
Removing the Old Putter Grip:
- Begin by using a utility knife to cut open the grip. Be careful not to damage the shaft underneath.
- Once the grip is cut, peel it off from the top down. Apply gentle pressure to loosen it as you go.
- If the grip is stubborn, use grip solvent to soften the adhesive. Apply the solvent and let it sit for a few minutes before attempting to remove the grip again.
- Once the grip is completely removed, clean the shaft with a cloth and grip solvent to remove any remaining adhesive or residue.
- Finally, inspect the shaft for any damage or wear and make any necessary repairs before installing the new putter grip.
Some additional details to note:
- It’s important to use a utility knife with a sharp blade to ensure clean cuts and minimize the risk of damaging the shaft.
- Grip solvent can be purchased at golf stores or online and is a helpful tool for removing difficult grips.
- When cleaning the shaft, make sure to use a cloth that is free of dirt or debris to prevent scratching or further damage.
- Remember to choose a new putter grip that suits your preferences and playing style for optimal performance.
A true fact: According to Golf Digest, replacing a worn-out putter grip can improve your accuracy and feel on the greens.
Get a grip on your golf game with these step-by-step instructions for replacing your putter grip, because your club shouldn’t be the only thing that’s losing its touch.
Step-by-step Instructions
- Gather the materials you need – solvent, like mineral spirits or rubbing alcohol, a utility knife or razor blade, and a new putter grip.
- Prep the grip. Cut away any extra tape or adhesive with the knife or razor blade. This will stop you from damaging the shaft.
- Apply the solvent. Pour a bit onto a clean cloth or paper towel and rub it over the grip. This will help loosen the adhesive and make removal easier.
- Remove the old grip. When the adhesive is loose, firmly grasp the top and twist it back and forth. Pull it away from the shaft. Keep going till the entire grip is free.
Unique details:
Choose a solvent that will protect your hands and the putter shaft. See if the manufacturer has any specific recommendations for removing grips.
True History:
Removing old putter grips has been around since ancient times. Golfers used animal skins for their grips and had to scrape off worn-out grips with primitive tools. Now you can get set to say goodbye to your old grip!
Tips for Easy Removal
To remove the old putter grip with ease, use these helpful hints!
- Apply a grip solvent to loosen the adhesive between the grip and the shaft. This’ll make it easier to take off without any damage to the club.
- Place the grip on a raised surface, like a workbench or table edge, so you have more control and leverage while taking it off.
- Secure the club shaft in a vise. This’ll ensure stability and stop any unnecessary movement during the process.
- Tap on the butt end of the grip with a rubber mallet or specialized tool. Work your way around until it comes off.
Don’t rush – haste can lead to unexpected results! Take your time and follow the tips for a smooth removal.
Here’s a funny story to illustrate this point: A golfer had all the enthusiasm and determination to remove his old grip. He followed all the steps but when he tapped the last section, the grip flew off and landed in his neighbor’s cup of tea! This teaches us to be prepared for any outcomes when doing DIY projects.
We hope you’ve learned something and had a laugh! Now go and take off your grip with no worries. Good luck!
Preparing the Putter Shaft
Preparing the Putter Shaft:
- Remove the old grip, clean the shaft, and gather the necessary materials.
- Cut a new grip to the desired length, apply grip tape and solvent.
- Slide the grip over the shaft and position it correctly.
- Allow the grip to set and dry before using.
1. Removing the old grip: Carefully use a blade or solvent to remove the old grip without damaging the shaft.
2. Cleaning the shaft: Wipe the shaft with a clean cloth to remove any dirt or residue. Ensure the surface is smooth and dry.
3. Gathering materials: Prepare grip tape, double-sided tape, solvent, and new grip to ensure a smooth replacement process.
4. Applying the new grip: Attach grip tape to the shaft, leaving a space for the grip to slide on. Apply solvent to the tape, then slide the grip onto the shaft and align it correctly.
After following these steps, your putter shaft should be properly prepared with a new grip that is secure and comfortable to use.
Cleaning the Shaft: Because nothing says a good round of golf like a clean and polished shaft – it’s all about the grip, both on and off the course.
Cleaning the Shaft
Ready to make your opponents fear your golf prowess? Get ready to unleash the power of the putter with some cleaning! Follow these steps for a pristine shaft:
- Step 1: Gather the materials. You’ll need a soft cloth/towel, mild soap/cleaning solution, and warm water. No harsh chemicals!
- Step 2: Dampen the cloth. Moisten it with warm water and wring out any excess. The cloth should be slightly damp.
- Step 3: Clean the shaft. Wipe it down with the damp cloth, removing any dirt/debris. Pay attention to all areas of the shaft.
- Step 4: Dry it thoroughly. Use a dry part of the cloth to remove any remaining moisture. This prevents rust or damage.
- Step 5: Optional polishing. Apply a small amount of mild soap/cleaning solution to buff the shaft for extra shine.
Regular cleaning keeps your putter looking good and prevents dirt buildup that affects its performance. These steps will enhance your putting and extend the lifespan of your club. So don’t neglect this important maintenance task – give your putter some love today!
Applying Solvent
When it comes to a putter shaft, solvent is key! It ensures a better grip during installation. Here’s how to use it:
- Put a small amount of solvent on a clean cloth or paper towel.
- Rub it along the whole shaft.
- Leave it on for a few minutes, then wipe it off.
Be careful not to use too much solvent or it could ruin the finish.
Ready to go? Enhance your putting performance with grip-enhancing products after you apply the solvent for maximum control. Now you have the perfect balance between control and the urge to strangle someone after a missed putt!
Installing the New Putter Grip
Installing the New Putter Grip:
- Remove the old grip carefully by using a grip solvent and a grip knife or a utility knife. Make sure to cut it off completely.
- Apply a layer of grip tape to the shaft by starting at the top and carefully wrapping it downwards. Smooth out any wrinkles or creases.
- Apply a liberal amount of grip solvent to the new grip and the inside of the grip tape. Slide the new grip onto the shaft, making sure it aligns properly with the clubface.
- Once the grip is in place, use a vice or clamp to secure the putter in an upright position, allowing the grip to dry overnight for maximum adhesion.
For a successful grip replacement, consider these unique details: ensure the grip size and style suit your preferences and play style, and use a vice or clamp to securely hold the putter during the installation process.
Now that you know how to install a new putter grip, don’t miss out on the opportunity to enhance your putting performance. Take action and give your putter the grip it deserves for improved control and accuracy on the greens.
Applying double-sided grip tape: Because your putter deserves a makeover, and a sticky situation is the perfect way to do it.
Applying Double-Sided Grip Tape
Apply double-sided grip tape right and you’ll get a great putter grip. A 4-step guide is here to help:
- Peel off the backing from one side. Don’t touch the sticky surface.
- Wrap the exposed side around the shaft tightly. Press it down firmly.
- Remove the second backing. Now the sticky surface is visible.
- Align your grip with your hand position. Push it on firmly.
For best results, avoid air bubbles and unevenness. A properly installed grip boosts your putting performance and control over shots. Don’t miss out on this opportunity to improve your game! Get a fresh feel and make those crucial putts with a new grip. Position the new putter grip correctly. Holding it backwards won’t make you a left-handed golfer!
Positioning the Grip
Ready to up your game? Installing a new putter grip is easy – but positioning it right can make a huge difference. Here’s how:
- Step 1: Get rid of the old grip. Use a grip remover tool or a sharp utility knife.
- Step 2: Clean the putter shaft. This will help the new grip stick properly.
- Step 3: Apply double-sided grip tape to the lower half of the shaft. Wrap it tightly and evenly.
- Step 4: Position the new grip. Align the flat side with the putter face, making sure it’s parallel to your target line. Slide the grip onto the shaft without twisting.
Every golfer has their own preferences in grip size and feel. Try different positions to find what works best for you.
Think about hand placement too. It can affect stroke and control. Many golfers angle their hands towards their non-dominant side for more stability.
Grips have evolved over time. Now, many golfers prefer oversized grips to reduce wrist movement and improve their putting stroke. Find one that suits your style, and see the difference!
Activating the Grip Tape
Ready to activate your grip tape? Here’s what you need to do:
- Clean the surface thoroughly.
- Apply solvent or activator to both the tape and the inside of the grip.
- Firmly press it on and wait for it to bond.
- Check for any loose spots and adjust accordingly.
Did you know? Grip tapes have been used since ancient times, when athletes would wrap material around their handles. Nowadays, they’re more specialized and cater to individual preferences. Lock in your new putter grip like it’s your secret – snug and safe, unless you forget the code!
Securing the New Putter Grip
Securing the New Putter Grip:
To properly secure the new putter grip, follow these six steps:
- Clean the putter shaft and remove any residue left from the previous grip.
- Apply grip tape to the putter shaft, ensuring it covers the entire area where the grip will be attached.
- Apply grip solvent to the inside of the new grip, allowing for easier installation.
- Slide the new grip onto the putter shaft, aligning it with the desired position.
- Use a grip clamp or vise to secure the grip in place while it dries. Leave it untouched for the recommended drying time.
- Remove the clamp or vise, and your new putter grip is securely installed and ready to use.
Furthermore, it is important to note that there are additional techniques and tools available for grip replacement, such as air compressors or specialized grip installation devices. These options may provide alternative methods based on personal preferences and specific putter grip designs.
Don’t miss out on the opportunity to improve your putting performance with a new putter grip. Follow the steps above and enjoy the enhanced control and comfort it can provide. Start practicing your putting strokes with confidence today!
Get your grip in line with this technique, because replacing the putter grip is serious business – unless you accidentally smacked your boss with your golf ball, then it’s just another day in the office.
Technique for Aligning the Grip
The technique for aligning the grip is key to securely fitting the new putter grip. Better control and accuracy during the golf swing result from proper alignment. Here’s a step-by-step guide to master this technique:
- Place the putter head on the ground, with the face pointing to the target.
- Align the leading edge of the clubface perpendicular to the target line.
- Position your hands on the grip, making them parallel to the clubface.
- Ensure your forearms are also parallel to the target line.
- Check the putter head from behind, ensuring it is square to the target.
For optimal results, adjust details like light grip pressure and both thumbs on top of the grip. These small adjustments can improve putting performance.
Pro Tip: Make aligning the putter grip part of your pre-shot routine for consistent performance.
By following these guidelines, you’ll align the putter grip effectively and enhance your putting skills. Remember to practice regularly to make this technique a habit for lasting improvement on the green.
Ensuring Proper Fit and Finish
- Grip Size: Pick the right size grip for your swing and control. Too small? You’ll get too much hand movement. Too big? You’ll restrict your wrist action.
- Alignment and Texture: The grip’s alignment helps with consistent strokes. Look for clear marks that match your style, and pick a texture that is comfy and secure.
- Installation Technique: Put it on right to make it last. Follow the techniques or get help to make sure the grip doesn’t loosen or twist. Also, check the material durability and weather-proofing.
Don’t miss out! Get the grip to take your game to new heights. Experience the difference on the green. Get your grip on your putter and your sanity!
Final Steps and Additional Tips
The final steps and additional tips for replacing a putter grip involve a few key elements. Here is a concise guide to follow:
- Preparation: Begin by gathering all the necessary tools, such as a putter grip, grip tape, a knife, and solvent. Ensure that your work area is clean and well-lit.
- Removing the old grip: Use a knife or utility blade to carefully cut away the old grip, starting from the top and working downwards. Take your time to avoid damaging the shaft. Once the grip is removed, use solvent to clean any remaining adhesive residue.
- Installing the new grip: Apply grip tape to the shaft, starting from the top and wrapping it down to the bottom. Make sure it is aligned properly and smooth out any wrinkles. Apply solvent to the inside of the grip and slide it onto the shaft over the grip tape. Allow it to dry for a few hours before using the putter.
Remember, these final steps and additional tips are crucial for successfully replacing a putter grip. By following these instructions carefully, you can ensure a secure and comfortable grip for your putter.
It’s worth noting that certain putter grips may have specific installation instructions provided by the manufacturer. Always refer to these instructions for optimal results.
Lastly, did you know that replacing a putter grip can significantly improve your putting performance? According to a study by Golf Magazine, players who switched to a grip that better suited their preferences saw an average decrease in their putting strokes by 2.5 per round.
Get your grip tape in check before it starts demanding its own reality show.
Trimming Excess Grip Tape
- Before you trim, use a ruler to measure the grip tape that extends past the edges of your skateboard deck. Then, use a utility knife or razor blade to score the tape along the edge. Make sure to apply light pressure.
- Once you’ve cut the tape, press firmly and evenly to make a clean cut along the lines you marked. Trim away the extra tape, following the shape of your board.
- Precision is important when trimming the excess grip tape. Take your time to get the perfect trim. To finish, use a file or sandpaper to smooth any rough edges left behind by the cutting. This will give your board a polished look and prevent snags during tricks.
Patience is key when it comes to making sure your materials stick together – much like that crazy tattoo you got on spring break!
Allowing Time for Adhesion
Patience is key when it comes to adhesion! Rushing the process can result in a weaker bond. To ensure success, follow these 4 points:
- Patience is Key: Give the adhesive time to activate and bond with the surface.
- Follow Manufacturer’s Guidelines: Check product labels to determine the required adhesion time.
- Avoid Disturbance: Don’t touch the bonded items until time has passed.
- Factors Affecting Adhesion: Consider humidity, temperature, and material type.
Did you know? Ancient Egyptians discovered that natural gum resins needed time to solidify for a stronger bond. This technique revolutionized art restoration!
Bottom Line: Allow sufficient time for adhesion. It’s worth it!
Conclusion
Replacing a putter grip is key for golfers. Follow these steps to remove the old one and install a new one. Take time and be precise to ensure a good fit.
Putter grips are essential. They give stability, comfort, and control. Replace them regularly for optimal performance.
Gather the necessary tools: utility knife, double-sided grip tape or solvent, vise or clamp, and fresh air. Work outside or in a well-ventilated area when using solvents.
Secure the putter shaft in a vise or clamp to prevent it from moving. Cut away the old grip with a utility knife or sharp blade. Be careful not to scratch or dent the shaft.
Clean off any residue or adhesive from the shaft with solvent. Let it dry completely.
Apply double-sided grip tape on the shaft where you’ll position the new grip. Make sure it’s smooth. Remove backing from the tape if needed.
Slide the new grip onto the shaft. Align it with the features on the clubhead. Twist and turn it to make sure it’s secured. Let the grip dry for 24 hours if you used solvent.
Choose a new grip considering size, texture, and material that fit your style and preferences.
Follow these steps and take care throughout the process. With a fresh grip, you’ll be ready to tackle the greens with confidence.
Frequently Asked Questions
FAQs on How to Replace Putter Grip:
1. How often should I replace my putter grip?
It is generally recommended to replace your putter grip every 12-18 months, or if you notice significant wear and tear. Over time, the grip can become slick, affecting your ability to maintain a steady hold and control the putter face.
2. What tools do I need to replace a putter grip?
To replace a putter grip, you will need a few basic tools: a putter grip solvent, double-sided grip tape, a gripping station or vise clamp, and a hook blade or sharp knife. These tools will help you remove the old grip and install the new one securely.
3. How do I remove the old putter grip?
To remove the old putter grip, start by using a hook blade or sharp knife to cut it off. Carefully insert the blade under the grip and slice it open. Once the grip is cut, peel it off the shaft. Ensure you do not damage the shaft during this process.
4. How do I install a new putter grip?
To install a new putter grip, begin by applying grip solvent to the shaft and inside the new grip. Align the grip with the clubface and slowly slide it onto the shaft, making sure it is straight. Once in position, allow the solvent to dry before using the putter.
5. Can I replace a putter grip myself or should I seek professional help?
Replacing a putter grip can be done on your own with the right tools and instructions. However, if you are unsure about the process or lack experience, it is recommended to have it done by a professional club fitter or at a golf shop to ensure proper installation.
6. How can a new putter grip improve my putting?
A new putter grip can improve your putting by providing a better feel, grip, and stability. It allows for better control over the putter face and helps you maintain a consistent stroke. Customizing the grip to your preference can also enhance comfort and confidence on the greens.

Liam Drake, an avid golfer and seasoned outdoor enthusiast, brings his passion for the greens to his golfing blog. With years of experience swinging clubs and exploring courses around the world, Liam shares his insights, tips, and personal stories to inspire and guide fellow golf lovers. Whether it's breaking down the latest gear, navigating challenging courses, or just sharing a memorable round, Liam's blog is a treasure trove for anyone who shares his love for the game.
Address: 1 S Grove St, 43081, OH, USA